Writing tests with Robot Framework - part 1 - Getting started
This post was published on January 18, 2023In this series of blog posts, I want to go through some of the features of Robot Framework, an open source test automation library that I think it still underappreciated. Step by step, we’ll build a robust, readable and maintainable test using Robot Framework and its Selenium (for UI testing) and requests (for API testing) libraries. As we go along, you’ll be introduced to some of the most powerful features of Robot Framework.
I invite you to code along with this blog post series to get familiar with Robot Framework yourself, but I’ll also make my code available on GitHub.
In this first article, you’ll see how to get started using Robot Framework and the SeleniumLibrary.
Robot Framework (RFW) is sometimes dubbed the ‘Swiss army knife’ of test automation. It is an open source framework that can be used to write tests for a range of applications, handling various interfaces and technologies. In the examples in this blog post series, we’ll focus on writing tests against a graphical user interface and a REST API.
For the GUI tests, we’ll use the SeleniumLibrary, which brings all the power and the features of Selenium WebDriver to RFW.
About Robot Framework
Why a series of blog posts about RFW? Because I think more people should know how to use RFW, and how to use it properly. It is a very versatile tool, able to do lots of things, and it has a great community behind it, and even its own conference.
Instead of writing code in Python, in RFW, you write your tests using keywords in a tabular format. This makes it easier to get started with, especially because you get a lot of features ‘out of the box’. It also has a lot of libraries that extend the capabilities of RFW even further, and you can also build your own. We’ll see all of that as we go along in this blog series.
Prerequisites
Before we get started, make sure you have the following installed:
- A recent Python version, available from here.
- An IDE of your choice. I use PyCharm with the Robot Framework Language Server and Robot Framework Support plugins.
- A ChromeDriver matching your Chrome version, and the folder containing it added to the PATH environment variable (so it can be run from any folder).
Getting started
Before we can start writing our tests, we need to install RFW and the SeleniumLibrary first. Both libraries are available using a single installer, so all you need to do is run
pip install robotframework-seleniumlibrary
Alternatively, if you’ve downloaded or cloned the code from the GitHub repository associated with this blog post series, you can also run
pip install -r requirements.txt
from the root folder of the project.
This will install both Robot Framework itself, as well as the SeleniumLibrary. That’s all we need for now to get started writing our tests!
Creating our first Robot Framework test
Robot Framework expects tests to be located inside files with the .robot extension, so you’ll need to create that first.
We then need to add some required sections in that file. Let’s get started with the *** Settings *** section, containing configuration values and metadata for the file:
*** Settings ***
Documentation    Applying for a loan at ParaBank
Library          SeleniumLibrary
The Documentation line contains a description of what our test(s) cover. The Library line makes all keywords in the SeleniumLibrary available in this .robot file. It’s very similar to an import statement in Java or Python.
Next, we’ll add a *** Test Cases *** section. This is where our test cases go. A test case is a series of keywords that together perform an action and corresponding assertions that make up the test. Our example test will cover submitting a loan request in an online banking system and comparing the application result to an expected outcome:
*** Test Cases ***
Applying for a loan with a too low down payment sees the application denied
    Open Browser    http://localhost:8080/parabank  Chrome
    Maximize Browser Window
    Input Text  name:username  john
    Input Text  name:password  demo
    Click Button  xpath://input[@value='Log In']
    Click Link  Request Loan
    Input Text  id:amount  10000
    Input Text  id:downPayment  100
    Select From List By Value  id:fromAccountId  12345
    Click Button  xpath://input[@value='Apply Now']
    Sleep  3 seconds
    ${loan_application_result}=  Get Text  id:loanStatus
    Should Be Equal As Strings  ${loan_application_result}  Denied
    Close Browser
Every keyword performs a Selenium action:
Open Browsercreates a new driver object and navigates to a specific URLInput Textfinds an element and types text into it, i.e., it calls the Seleniumsend_keys()methodClick Buttonfinds an element and clicks on it
and so on.
Right now, our test is still written in a very procedural way (click this, type that, …). Don’t worry, we’ll improve the structure, readability and reusability of our code in future posts.
Also, like in regular Python programming, indentation is significant when you’re writing tests. This means, among other things, that keywords in test cases should be indented (at least two spaces), and that the separator between two arguments to a keyword should again be at least two spaces.
Running our test
Now that we’ve created our test, we can run it from the command line using
robot article_01.robot
Note: if you want to code along, please change the URL in the first argument to the Open Browser keyword from http://localhost:8080/parabank to https://parabank.parasoft.com/parabank to access the public instance of the web application we’re writing tests for.
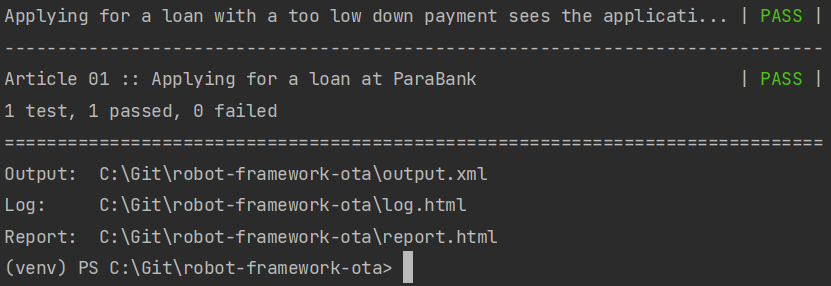
The test will run and RFW will print the test result to the command line:

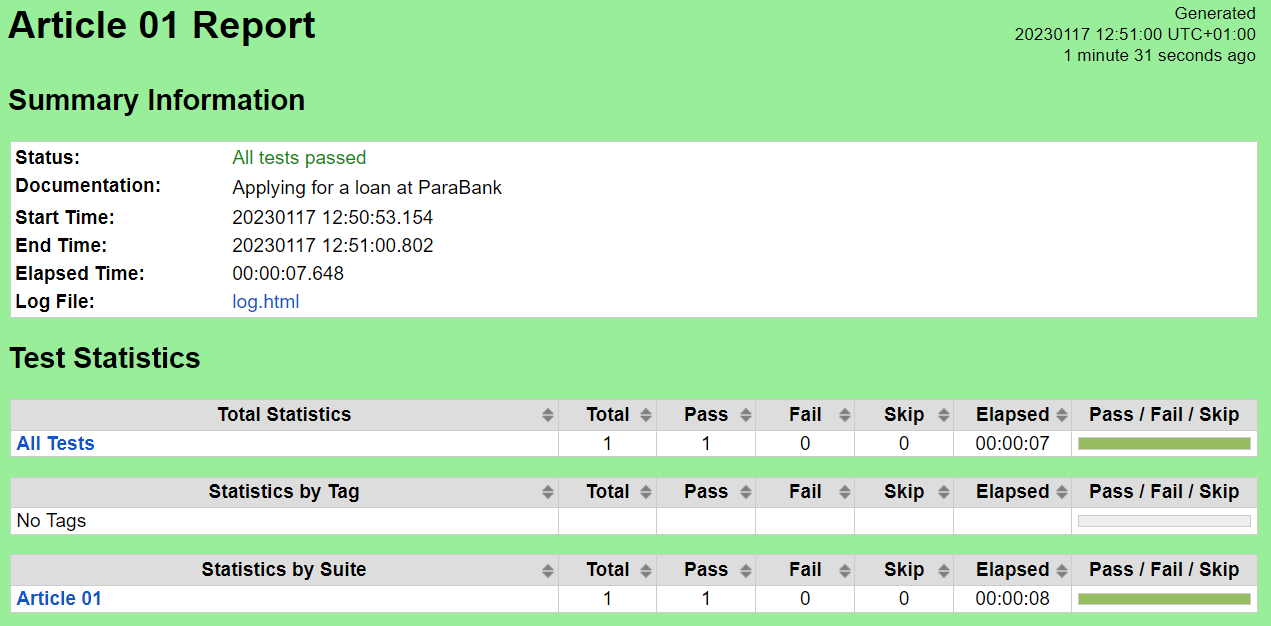
Additionally, RFW has created an HTML report summarizing the test results:

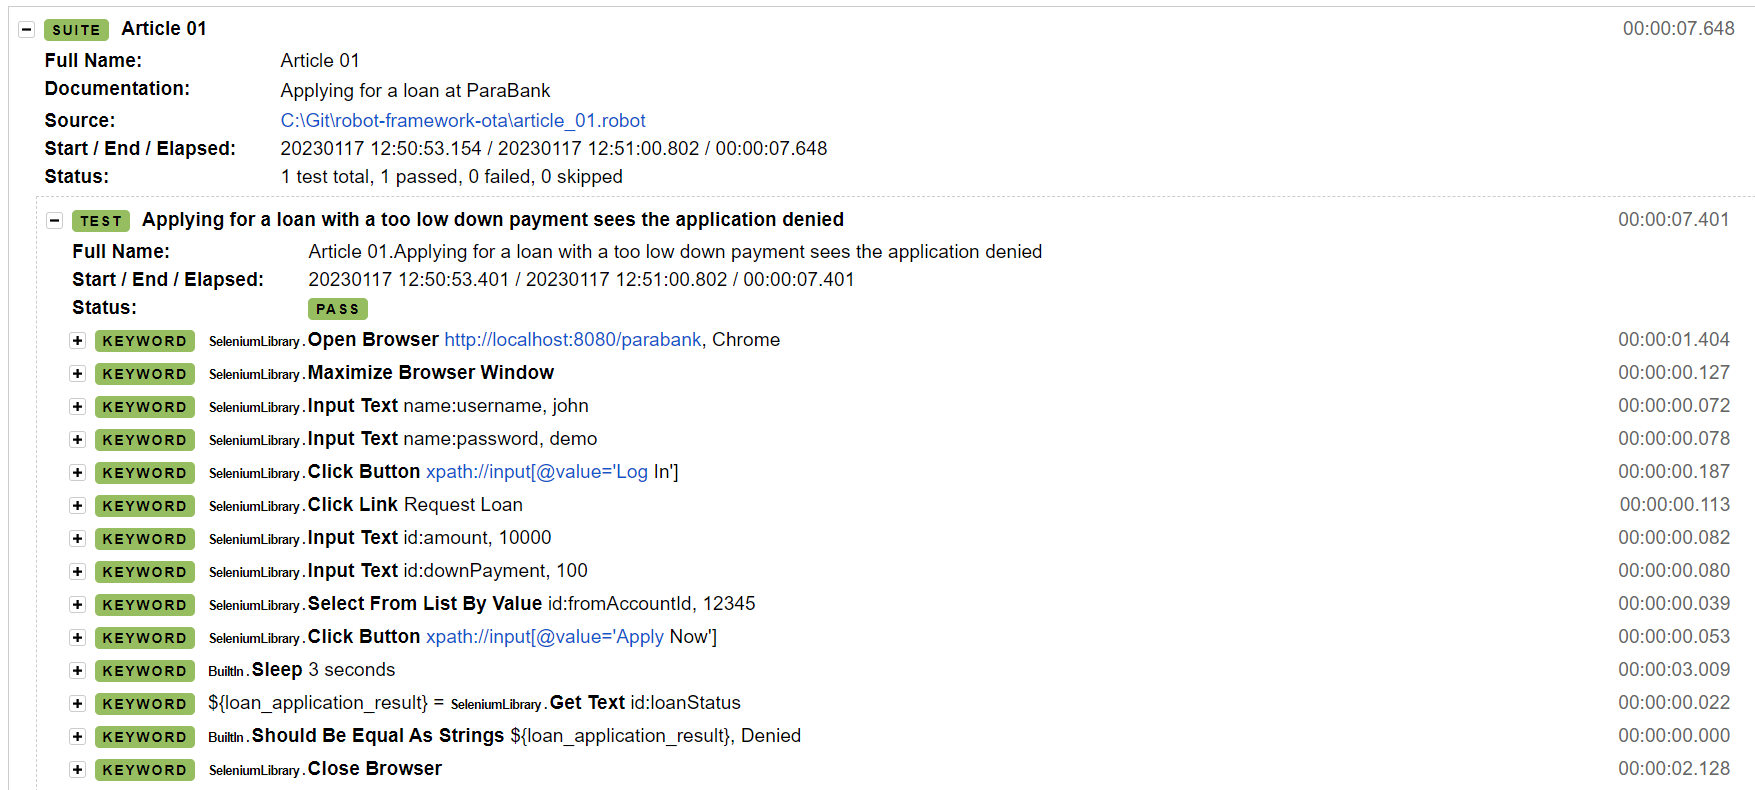
and even a detailed, step by step log containing the execution result and details for all individual keywords called during this test:

Pretty nice, and all of that out of the box!
That’s it for now. We’ve seen how to install and get started with Robot Framework, and how to write our first test against a sample web application using the SeleniumLibrary.
As promised, in the next article, we’re going to improve the reliability of our test by introducing Selenium explicit waits and creating our own keywords to help us do that effectively.
"